Tutorials/Minimap
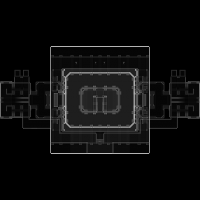
Minimaps have two purposes: help the player navigate some very large and confusing map and promote teamplay by showing the location of your teammates. They are created by the mapper and are part of the assets of a map. They follow more or less the old design document. Each minimap consists of a number of zones: in each region of the map a different image can be used, for example to represent the different floors of a facility.
Contents
How to create a minimap: the quick and simple method
- Open the map using netradiant.
- Go in the Build menu and select Customize.
- Search for the minimap command line and set the number after -size to a large value (e.g. 512).
- Go in the Build menu and build the minimap.
- Note the numbers in the log window appearing after size_texcoords.
- Put the resulting tga file in the minimaps/ folder.
- Create a file minimaps/<name of your map>.minimap and write it using the following template (by replacing 1, 2, 4 and 5 by the first, second, fourth and fifth number appearing after size_texcoords):
{
    zone {
        bounds -100000 -100000 -100000 100000 100000 100000
        image "minimaps/<mapname>" 1 2 4 5
    }
}
- Load your map and enjoy that magnificient minimap.
How to create a minimap: tutorial using q3map2
q3map2 can create minimaps from the .map file. These minimaps basically show the solid walls by checking how much solid brush is under each pixel: a wall has a big intersection with the vertical line but a floor not so much.
Configuring netRadiant
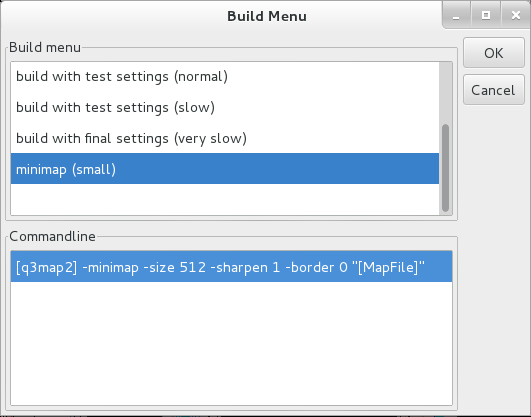
Before you start generating images you probably want to change the options given to q3map2 and make sure the image size is at least 512. To do that go on the Build menu and select Customize. Below is a very simple sample configuration for a minimap build.
You can use the q3map2 minimap options list below to customize the output. A good default build line is
[q3map2] -minimap -samples 10 -size 512 -border 0.0 "[MapFile]"
Creating the images
Running the minimap build at this point will create a single minimap image for the whole map. You might want to create several images either because the maps is too cluttered (many intricate levels) or because the map is too large.
If you simply want to cut the minimap in several parts, first try to make a bigger image (image with a size of 2048 should work in the engine) with a bigger globalScale parameter in your minimap config file. If you aren't happy with the result, try using the minmax switch for the minimap build to render a smaller part; make sure the different images overlap so that there is a smooth transition ingame.
When the map is too cluttered, the only solution is to cut parts of it and make differents zones for the different levels of your map. To do this remove all the parts you don't want to see and fill the "holes" left in you map with a solid brush (to avoid leaks).
Creating the minimap file
To create the minimap follow the manual, look at the example in the simple tutorial or look at an existing minimap file. You'll have to add parameters and potentially more zones. You can keep most parameters to their default value. The tricky part are the bounds and image parameters.
For the bounds parameter you can either:
- picks the points coordinates by hand in netRadiant
- use the 6 size_texcoords numbers in the q3map2 output
- use the parameter you gave to the minmax q3map2 switch is you used it.
These numbers will make a somewhat good default value for the zone bounds then you can tweak it so that it to your taste. Note that the numbers must always by <xmin> then <xmax> as in the doc, otherwise the zone will never be used. You can use multiple zones with the same image to define a more complex shape.
For the image parameter, first use the image filename without the extension then big the four numbers highlighted in the q3map2 log below and paste them in the same order (do not confuse size and size_texcoords).
Minimap file manual
A minimap file has the following structure (with at least one zone block)
{
    <zone blocks or global parameters>
}
With each zone block with the following structure
zone {
    <zone-specific parameters>
}
The zone are used to show different images in different regions of the map. When a player gets outside the bounds of the zone he is currently on, zones will be searched in the order defined in the file to choose the new image. If no zone fits then the last one defined will be used. This way you can define a default zone by putting at the end of the minimap file the following zone block:
zone {
    bounds 0.0 0.0 0.0 0.0 0.0 0.0
    <other parameters>
}
Global parameters
backgroundColor
backgroundColor <float r> <float g> <float b> <float a>
Chooses the color of the background of the map. Defaults to opaque black. If the map has been generated by q3map2 you most probably to leave it to opaque black. You can use a transparent background but it won't play well with semi-transparent maps; you'd better use a binary transparency and a semi-transparent background color.
globalScale
globalScale <float ratio>
Multiplies the size of the minimap and all the minimap objects by the given ratio: it is a sort of global zoom of the map. Defaults to 1.0.
Zone-specific parameters
Each zone block must have a bounds and image parameter or an error will be generated.
bounds
bounds <float xmin> <float ymin> <float zmin> <float xmax> <float ymax> <float zmax>
Defines in which "box volume" this zone is in effect. The arguments are world units and must be in that order (xmin < xmax, ...)
image
image <filename> <float xmin> <float ymin> <float xmax> <float ymax>
Defines which image to use and what rectangular area that image represents in the world. The four position arguments are in world units; they are the X and Y bounds of a brush that would cover the whole minimap. The filename should ideally be without the file extension (you could theoretically use a shader name too).
scale
scale <float ratio>
When the player is inside the zone, multiplies the size of the minimap and all the minimap objects by the given ratio. Defaults to 1.0.
q3map2 minimap options
The q3map2 commandline looks like this in netRadiant:
[q3map2] -minimap <switches> "[MapFile]"
"Color" switches
autolevel
-autolevel
Tries to find automatically the right contrast and brightness values to use. Defaults to off.
boost
-boost <float b>
Changes the gamma of the resulting image using the following formula color' = color / ((b - 1) * color + 1). Defaults to 1.0. (the pass is made before the contrast/sharpen pass)
contrast
-contrast <float c>
Changes the contrast of the resulting image using the following formula color' = color * c + sharpen. Defaults to 1.0. (the pass is made after the boost pass)
noautolevel
-noautolevel
Will not try to find automatically the right contrast and brightness values to use. Defaults to on.
sharpen
-sharpen <float s>
Changes the brightness of the resulting image using the following formula color' = color * contrast + s. Defaults to 1.0. (the pass is made after the boost pass)
Output control switches
black
-black
Writes the resulting minimap as a black TGA file with levels of transparency. (It was not tested yet, maybe the engine will treat it as a completely black image)
gray
-gray
Writes the image as a GRAY8 TGA file.
o
-o <filename.tga>
THIS IS SET AUTOMATICALLY BY NETRADIANT. Sets the filename of the output file.
white
-white
Writes the resulting minimap as a white TGA file with levels of transparency. (It seems our engine converts it in levels of gray)
Region switches
border
-border <float ratio>
Adds borders to the image with size (image_size * ratio). Defaults to 0.0 (at least for Tremulous).
keepaspect
-keepaspect
Makes it so that the resulting image will keep the aspect ratio (a square will stay a square) by adding empty space. Defaults to on.
minmax
-minmax <float xmin> <float ymin> <float zmin> <float xmax> <float ymax> <float zmax>
Restricts the minimap to the part of the map contained in the box defined by the parameters. By default this box is the bounding box of the whole map.
nokeepaspect
-nokeepaspect
THIS IS NOT SUPPORTED BY THE UNVANQUISHED MINIMAPS and included for completeness only. Allows q3map2 to not preserve the aspect ratio (in some way). Defaults to off.
size
-size <int N>
Changes the sizes of the resulting image to NxN. defaults to 512 for Tremulous.
Sampling switches
random
-random <int n>
Makes the minimap generation use random samples and sets the number of samples to take for each pixel of the minimap. Defaults to on and 1.
samples
-samples <int n>
Makes the minimap generation use ordered samples and sets the number of samples to take for each pixel of the minimap. Defaults to off and 1.


