Tutorials/Getting started with NetRadiant
Note
The recommended level editor is NetRadiant.
See Level editors for other tools.
Contents
Getting and installing NetRadiant
- Download a prebuilt archive from the NetRadiant download page.
- Just unzip the archive and run the
netradiantbinary.
Arch Linux users can also use the netradiant-git PKGBUILD to get the editor.
Note: NetRadiant-custom will not work.
You may have heard of a fork named netradiant-custom by Garux and may be wondering if it can be used for mapping with Unvanquished. While it features very interesting things, it is unfortunately not compatible. NetRadiant-custom derivated from mainstream around 2014 and most of the development that happened upstream to support Unvanquished is missing:
- No support for DPK game archives neither the DPKdir source repositories.
- No support for WebP and CRN image formats used by the released game. Support of the PNG image format may be buggy.
- The produced minimaps will not work in game (not all files are generated).
- The Unvanquished gamepack doesn't work, some people even reported the editor crashes when loading it.
One good news though: support for IQM model format was recently added but we didn't tested this yet (it doesn't use the same library).
Gamepack
NetRadiant is designed to work with many Quake-based games, not just Unvanquished. The Unvanquished gamepack is provided with NetRadiant so you have nothing more to do. Just make sure the current game selected for mapping in NetRadiant is Unvanquished.
Start up NetRadiant for the first time
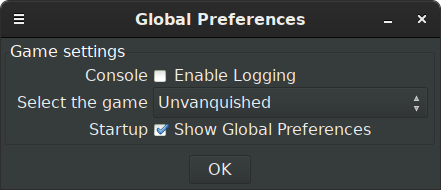
When you first start up NetRadiant you will be asked what game you want to edit levels for.
- If Unvanquished is not listed, then you don't have the right NetRadiant package.
- If you don't want to see this dialog on startup you can untick the second checkbox.
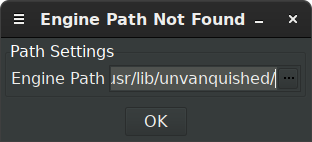
You may also be asked for the game's engine path if NetRadiant can't find it. This is the "default binary directory" in the table below. This is the location where the game stores its pkg folder holding the many .dpk resources.
Note
If you installed the game using Flatpak or Universal zip or other means, see Game locations for specific paths.
When using the Unvanquished launcher, the default system paths are:
| Platform | Default binary directory (libpath) |
|---|---|
| Linux #xdg | ${HOME}/.local/share/unvanquished/base
|
| Windows | %ProgramFiles%\Unvanquished
|
| macOS | ${HOME}/Games/Unvanquished/Unvanquished.app/Contents/MacOS
|
- #xdg: More precisely:
${XDG_DATA_HOME:-${HOME}/.local/share}/unvanquished/base(it's an XDG data home directory).
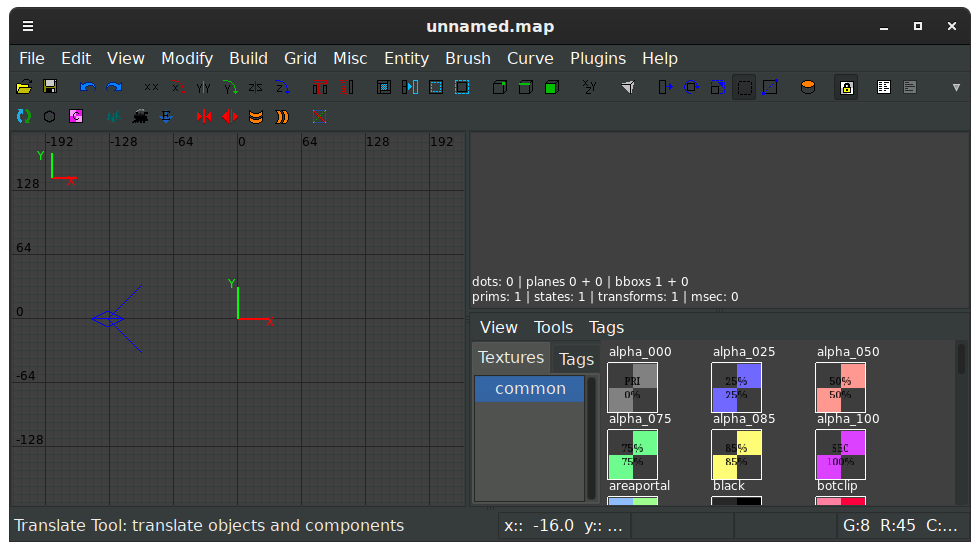
Finally you should be greeted by NetRadiant's default interface:
Make sure you have a common shader category. If you do not, contact the devs via chat or the forums.
Setting some recommended options
- Main window, menu Edit > Preferences, tab Settings, disable Add entity and brush number comments on map write.
- Main window, menu Edit > Preferences, tab Settings/Brush, enable Always use caulk for new brushes.
- Main window, menu Edit > Preferences, tab Interface/Layout, select the layout with three 2D view and texture browser, the one on the absolute right in NetRadiant preferences.
- Texture browser, menu View, enable Shaders Only.
Getting started
This is not a complete guide. Another tutorial will be required to tell how to make a complete map with required entities and all, but if you already mapped for other games before, this will give you the prerequisites you may miss.
Editing an existing map
Let's imagine you want to edit the chasm map :
- Locate the
pkg/map-chasm_1.2.dpkfile in your installation directory (see above) and extract it aspkg/map-chasm_src.dpkdirin your user directory (see above). The.dpkfile is a zip file with a different extension, so if your system does not recognize it, just make a copy with a.zipextension and extract it. - In the end you'll get something that looks like
pkg/map-chasm_src.dpkdir/maps/chasm.map(and other files in the dpkdir). Just open that file in NetRadiant and do some edits, then build the map using the build menu. Congratulation, you can now load your edited map in game!
Making a new map from scratch
Let's imagine you want to make a map named castle:
- Create a folder in your user directory (see above) in a way it is named
pkg/map-castle_src.dpkdir. - Create a subfolder named
mapsthis way:pkg/map-castle_src.dpkdir/maps. - Add a file named
DEPSthis way:pkg/map-castle_src.dpkdir/DEPS. For a start, just writetex-allin this file. - Open NetRadiant, save the default empty file as
pkg/map-castle_src.dpkdir/maps/castle.map. - Click the refresh button on the toolbar, all the texture sets must appear in the texture browser! Now you can start mapping.
To make the map loadable in game, you need at least one each of those three entities (within the walls of the map!):
-
pos_player_intermission -
team_human_spawn -
team_alien_spawn
Make sure the spawn entities are not touching the ground (the game will place them on the ground for you).
If only the pos_player_intermission entity is present, the game will load the map but the match will end immediately because there are no spawns, it's possible to load such map and prevent the match to automatically end by setting g_neverEnd on beforehand.
Becoming a mapper
See Mapping guide.


