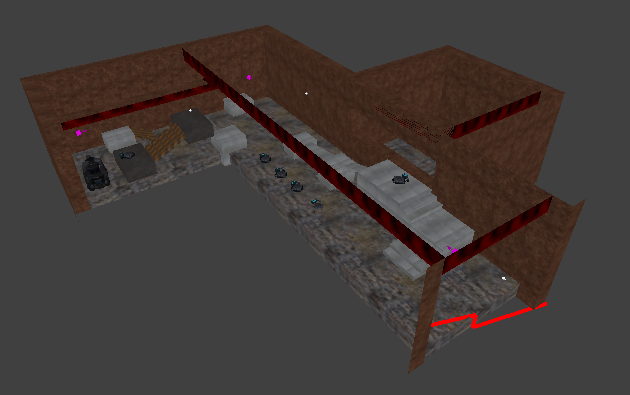
Tutorials/Mapping guide
Note
The recommended level editor is NetRadiant.
See Level editors for other tools.
With this guide new users can get involved in Unvanquished mapping within minutes. Only basic video game experience and computer skills are expected, however this page does go into more technical details occasionally for those who wish to know more. If you do not understand any section, skip over it for now and re-read it later.
See also Old mapping page.
Contents
- 1 Installation of the required tools
- 2 Important Advice
- 3 Important Unvanquished Map Concepts
- 4 Getting Started with NetRadiant
- 5 Further skills
- 6 Further reading
Installation of the required tools
See Getting started with NetRadiant for installing NetRadiant and get basic information about how to configure and run it.
The download and installation process for NetRadiant will only take a few minutes. The tools are all free and open-source, just as the game is.
Important Advice
Just like every other art, mappers must expect and prepare for their own emotional reactions to their work, especially early work. Many people make the mistake of labelling their first creations as "failures" because they compare them with the finished and released works of accomplished mappers. It is just as unreasonable to expect "instant skill" in mapping as it is to assume this for any art.
All attempts are learning exercises, and all artisans start somewhere. Famous mappers release much less than than make, and resent as many of their decisions as they love. Enjoy your mapping!
Make life easier for yourself
- Making maps is fun. If you dislike mapping a certain way, stop and think of something else.
- Don't be OCD. Make maps messily — there is no performance penalty for players and you will work much faster, getting much more emotional reward.
- Don't make any part of your work symmetrical. It takes twice the work and fiddling to make something many other people have done before.
Don't use a linear approach to making your map
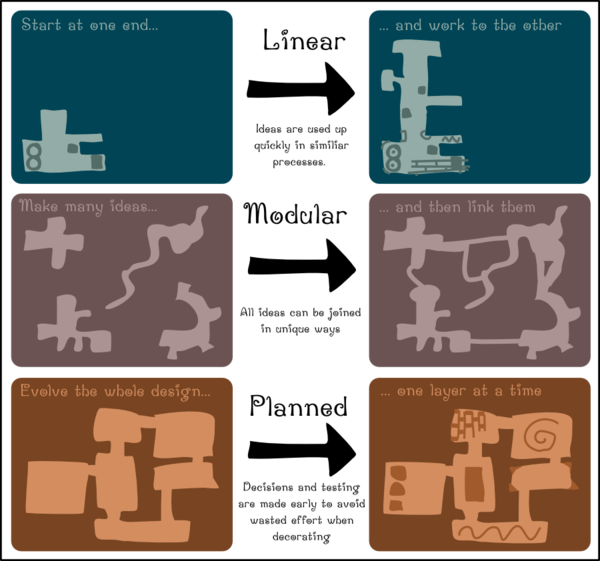
Many people become frustrated when trying to create a map from one end to the other. This puts a focus on small detail (micro) rather than the map itself as a whole (macro).
These two map making approaches are highly recommended:
- Planned: Create the layout of your whole map in rough shapes and test it. Then slowly add more detail all over, layer by layer.
- Modular: Create and detail detached, individual rooms or modules. Choose the best and discard others. Then link and duplicate them all together into a map.
Map making involves a variety of experiences
- Take different ideas to a variety of lengths. Start with the expectation of playing around: not to complete a whole map.
- Tear other people's maps apart in an editor to see what they did.
- If you have some good ideas working, consider making a full map for release.
Important Unvanquished Map Concepts
This information is a brief summary, but enough for you to get an understanding of how several parts of the game and mapping work for Unvanquished. You are encouraged to read further — a good place to start is on the mapping page.
A lot of the concepts here are inherited from Quake, a game made in the 90's by ID Software. Unvanquished is part of a chain of games with a heritage traceable back to Quake.
N.B. Unvanquished uses the Dæmon engine. Engines are the code that determines how a game works.
Brushes
In an editor such as NetRadiant maps are made out of 'brushes'. Brushes are 3D shapes such as boxes, cylinders and planes. Shaders (textures/pictures) are then placed on the surfaces of these shapes. This is what Niveus looks like in NetRadiant:
Here two brushes have been selected and you can see that they are simple 3D shapes. One is an ordinary box and beneath it is a box with sloped sides. Every single part of the map's geometry is designed out of shapes like this.
Leaks
Unvanquished follows the indoor engine philosophy: it expects maps to be massive airtight containers. If a map has a gap anywhere to the outside world it's considered a leak and won't compile (more on this later).
This is what Niveus looks like in-game when viewed from outside the airtight play space:
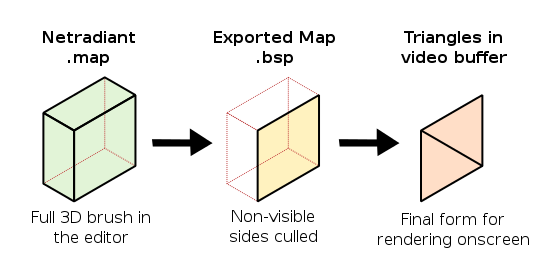
This looks nothing like the collection of 3D brushes used to make the map, because it has been processed further by the computer. During compilation only the sides of brushes visible when playing the map are kept; everything else is never seen anyway and hence considered a waste of computer resources. You can see inside through the walls of this picture because the 'faces' or 'sides' of the map are only visible in one direction.
Video games are only interested in surfaces — not what's inside objects — because that's all the player will ever see. The barrels in the above image are just as hollow as everything else. NetRadiant allows you to make maps using tangible 3D objects simply because it's easier for humans to understand and manipulate, not because that's how the game works. If you have not done any 3D modelling or map making before, this will be very new to you.
More on 3D shapes in video-games
Your computer performs a large amount of horrendously fun calculations involving 4x4 transformation matrices and other long words in order to work out how a 3D world should look on your flat monitor.
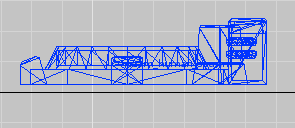
To better visualise how games treat 3D objects: break down the surfaces inside any game into a set of triangles. A wall is made of rectangles which are made of two triangles each. A curve is just lots of small rectangles, made of triangles. Circles are also lots of triangles, enough to avoid looking straight-edged most of the time, but sometimes visible when looked at closely.
Each triangle is only visible from one direction (for technical reasons) so surfaces do not appear to exist when viewed from the wrong side. Most quake games (such as Unvanquished) try to hide their polygonal nature.
If you want to dive more into triangles and rasterisation (drawing triangles on-screen): have a poke at the Wikipedia article on rasterisation.
Skyboxes
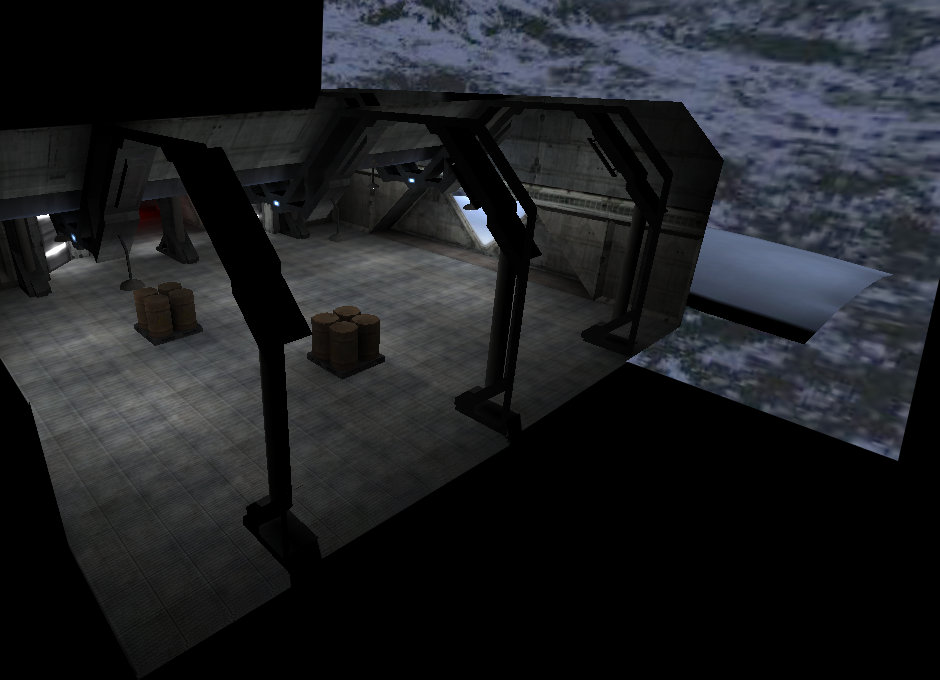
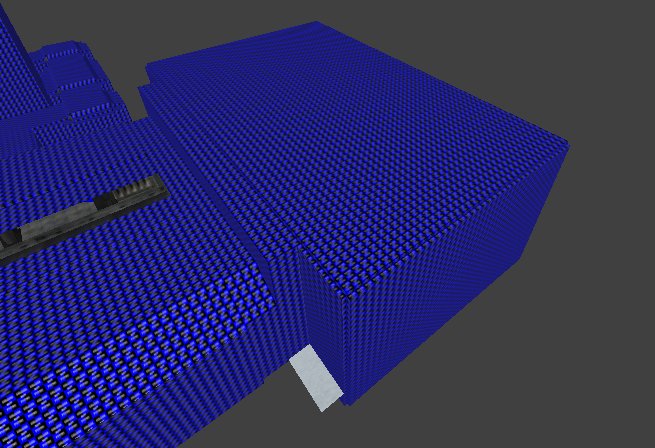
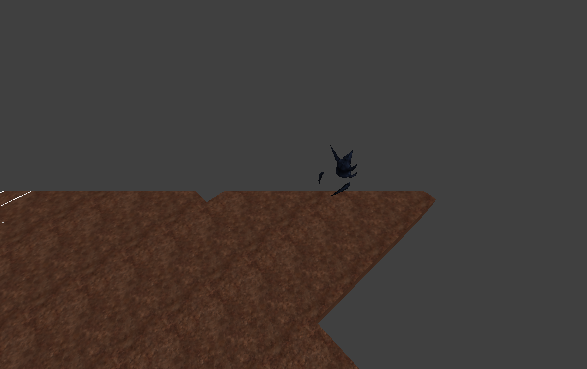
Sky in unvanquished is faked using surfaces that pretend to be a distant sky. This way the sky can be seen without there being any leaks. This is how the spot outside the window in the previous picture looks in NetRadiant:
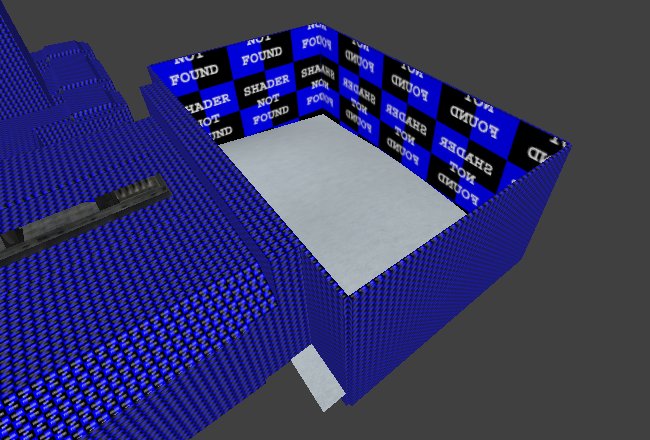
You can't see in because there is a lid on this box to prevent leaks. This is the same spot with the top off:
This example is showing "Shader Not Found" instead of a skybox-like texture because this map was imported from a final format, not opened from the original .map file. This area is what you see outside of the window near the human start point.
Compilation
The '.map' made in NetRadiant needs to be compiled into a '.bsp' for the game to be able to use it. Compilation performs many complex mathematical operations, taking some time for larger maps.
Some things compilation does:
- Calculate lighting
Lighting determines what parts of your map are dark and which are light. Although this cannot be seen in the editor, a map without lights is generally pitch black.
- Optimising brush visibility.
The game does not want to waste time 'drawing' parts of maps the player cannot see. This step sets up lists of surfaces for the game to 'render' onto the user's screen, depending on which area/room of the map the player currently is.
VIS
VIS is short for visibility. Games like Unvanquished feature heavy optimisation in order to ensure the player has a smooth framerate. In quake-derivatives VIS is a system to ensure only small subsets of a map are 'rendered' by the game at once, rather than rendering the whole map every frame (including things you can't see).
The compiler can either calculate VIS completely on its own or with hints from the mapper. Hinting and manually setting up VIS in NetRadiant is covered in other tutorials. This process is useful in maps where either compile time or in-map performance has become an issue with the automated VIS generation.
Shaders
Different games define the word 'shader' in different ways. The definition here applies to all Quake derivatives.
A shader defines how a surface looks. In its most minimal form it's just a texture (image) applied to a brush to give it an appearance. Shaders can be setup to do many interesting things, such as make a flat surface pretend to be 3D (via normal or bump maps), pretend to be an infinitely distant sky (a skybox) or always be bright like a lightbulb.
This guide will use shaders from existing maps rather than take the reader through the process of creating shaders.
Game Storage Locations
Unvanquished creates its virtual collection of resources (textures, maps, etc) using data from a variety of locations. A more accurate and in-depth elaboration on this is available in Packaging_game_data.
Unvanquished normally stores its resources in:
- Its installation directory, as files and folders
- The user's Unvanquished directory, as files and folders
- .dpk files in the installation directory
- .dpk files in the user's directory
For the rest of this guide, these four things are going to be called resources. Generally the installation directory resources are never touched except through updates -- we will store our work in your local user directory for the game.
The location of these folders depends on your installation choices and environment, however this is a rough guide:
If you installed the game using Flatpak or Universal zip or other means, see Game locations for specific paths.
When using the Unvanquished launcher, the default system paths are:
| Platform | Default binary directory (libpath) |
|---|---|
| Linux #xdg | ${HOME}/.local/share/unvanquished/base
|
| Windows | %ProgramFiles%\Unvanquished
|
| macOS | ${HOME}/Games/Unvanquished/Unvanquished.app/Contents/MacOS
|
- #xdg: More precisely:
${XDG_DATA_HOME:-${HOME}/.local/share}/unvanquished/base(it's an XDG data home directory).
The default user directory is:
| Platform | Default user directory (homepath) |
|---|---|
| Linux #xdg | ${HOME}/.local/share/unvanquished
|
| Windows | %USERPROFILE%\Documents\My Games\Unvanquished
|
| macOS | ${HOME}/Library/Application Support/Unvanquished
|
- #xdg: More precisely:
${XDG_DATA_HOME:-${HOME}/.local/share}/unvanquished(it's an XDG data home directory).
Map and Resource Packaging
When making your map you need to know how the game and NetRadiant expects the resources to be organised. Using your own organisation system will confuse the game engine, which thinks its system is perfect zen. The current system described here will hopefully be replaced in the future as hinted at on the blog.
If you navigate to your game's installation directory you will find some game resources, including some .dpk files in a folder called main. These files are zip files -- if you can't open them, copy one and rename it from dpk to zip. Have a look at what's inside map-niveus_1.1.0.dpk:
map-niveus_1.1.0.dpk
   ├── about
   │   └── niveus.txt
   ├── env
   │   └── niveus
   │       ├── snowy_bk.jpg
   │       ├── snowy_dn.jpg
   │       ├── snowy_ft.jpg
   │       ├── snowy_lf.jpg
   │       ├── snowy_rt.jpg
   │       └── snowy_up.jpg
   ├── meta
   │   └── niveus
   │       └── niveus.arena
   │       └── niveus.jpg
   ├── maps
   │   └── niveus.bsp
   ├── models
   │   └── mapobjects
   │       └── niveus
   │           ├── computer.blend.jpg
   │           ├── computer.jpg
   │           ├── computer.md3
   │           ├── fern_leaf.png
   │           ├── fern.md3
   │           ├── palm_leaf.png
   │           ├── palm.md3
   │           ├── wallthing.jpg
   │           └── wallthing.md3
   ├── scripts
   │   ├── niveus.particle
   │   └── niveus.shader
   ├── sound
   │   └── niveus
   │       └── steam.wav
   └── textures
       └── niveus
           └── (a long list of texture files)
You can see that the compiled map file (.bsp) is in a 'maps' folder, the textures are in a 'textures' folder, etc. These are the resources, as defined in the last section.
The exact purpose of all of these files and folders will be described later. You will not use many of them to start with: only a map file (.bsp) is necessary to get a map working in-game.
When you play Unvanquished, the game layers all of the resources found in the various directories and .dpks into one spot. This means that all of the texture folders mix contents, all of the map folders mix contents, etc. In the end the game expects to be able to find all maps in 'maps', all textures in 'textures', etc. This means one set of resources can override the contents of another if files share names -- which is why the contents of for example 'textures' is put in a subfolder with the map's name. It's confusing and redundant, but you will be taken through it later.
Making a dpk is a final step to release your map. When working on your map the resources that would be in the .dpk (textures, maps, etc) can instead be kept in a folder with '.dpkdir' at the end. DPKs are only made from these to make distributing maps and resources over the web simpler.
Alternatively you can make resource folders such as 'textures' and 'maps' directly in the Unvanquished install directory or your user's Unvanquished directory, however this would store your map along with other junk, making managing it messier and creating a .dpk of it more fiddly.
Getting Started with NetRadiant
NetRadiant Interface Overview
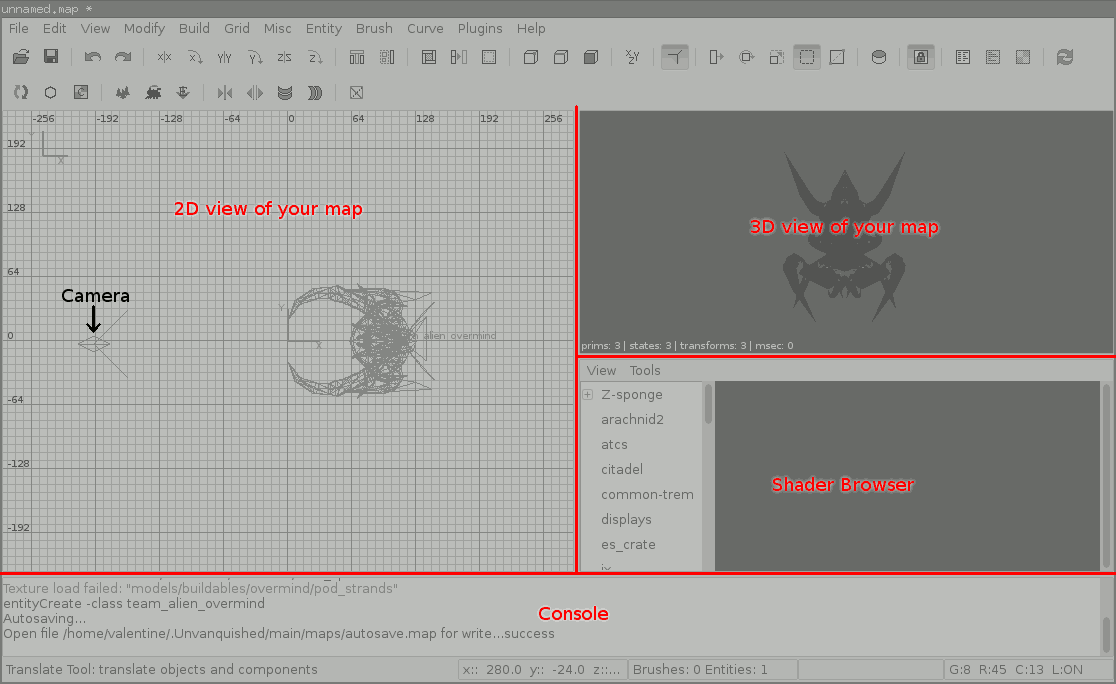
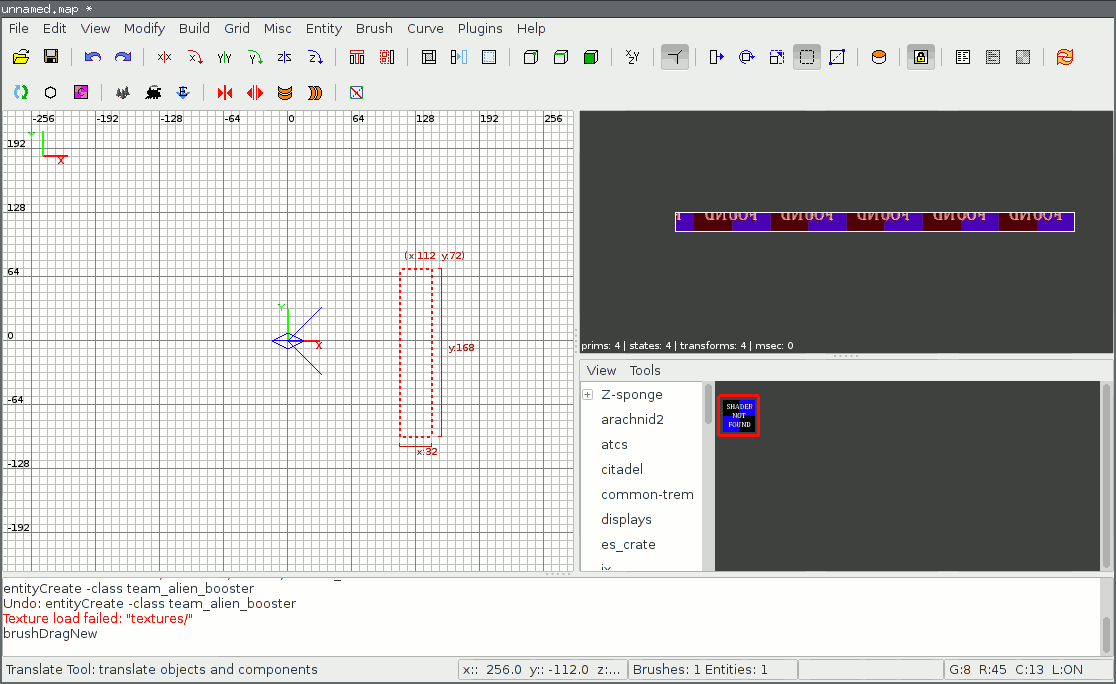
NetRadiant's window is split in several discrete areas. These areas can be resized by dragging on the separating lines between them (marked in red).
| Area of NetRadiant GUI | Purpose |
|---|---|
| 2D view | View your map from orthogonal angles. Top, bottom, right, left, etc |
| 3D view | View your map from the perspective of the camera, in proper 3D. |
| Shader Browser | Lists all of the shaders (materials) NetRadiant can find |
| Console | Location for text information, such as errors and compilation logs. |
The camera is not actually part of your map, but instead a representation of where the 3D view is "seeing" things from.
Learning the Basic Tools
It is highly recommended you work along with the guide whilst reading it, rather than reading it and attempting the processes later. You will learn and remember much more effectively when doing the process yourself.
Mke sure you are working on a new, blank project. This guide is assuming there is no Overmind still sitting on your screen.
Keyboard shortcuts
NetRadiant is a two-handed program. You will need to both use your mouse and your keyboard to ensure efficient and enjoyable mapping.
Tools will be referred to by their key shortcuts, eg the Q tool. Pressing this key on your keyboard will select this tool
Adding some brushes in the 2D view
You will notice there is a scale on your grid. Each 32 quake units of measurement approximately equals one metre. The very centre of your grid is called the origin because it is where all of the numbers (coordinates) start from.
Ensure you are using the Q (resize) tool:
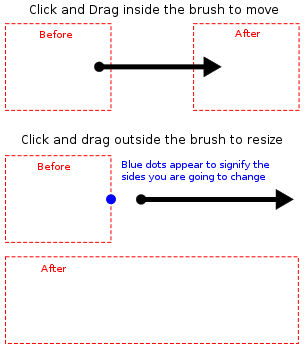
The Q tool allows you to do three things in your views:
- Create brushes (if none are already selected)
- Move brushes (by clicking and dragging on them)
- Resize brushes (by clicking and dragging near, but outside, of the edges of the brush)
Your camera should be in the middle of the view (on the origin) facing to your right. Click and drag a large box in front of the camera on your 2D view to make your first brush.
A few things will happen:
- A red outlined brush will appear in your 2D view. Red means it is currently selected.
- You will see the brush appear in your 3D view, as it's in front of the camera.
- The shader browser will tell you that you have not given the brush a real shader yet.
You have now created your first brush, in the form of a rectangular prism. Now try the other two types of manipulation provided by the Q tool on your brush — moving the brush and changing the size of its sides.
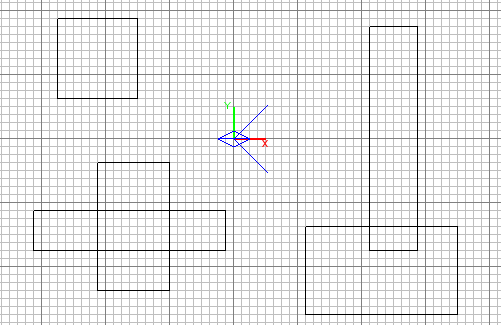
Press Esc to deselect your first brush. Now make some more.
To re-select a brush, hold Shift and click on it. Clicking it again with Shift held down will deselect it. Pressing Esc will de-select all selected brushes.
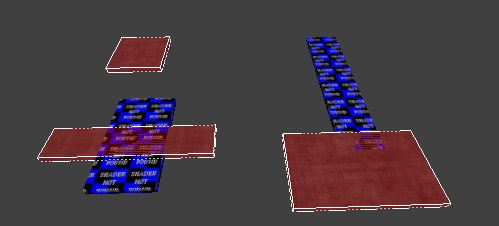
2D view has a lot of limitations:
- It is difficult to select the desired brush when many overlap.
- Map can only be viewed from certain arbitrary angles
- You cannot see what shaders look like applied on your brushes.
The 3D view helps mappers get around these limitations
Read the whole next paragraph before attempting this
...or you might get your mouse stuck in 3D view, and not know what to do to get out
Right click on the 3D view to start navigating your map with it.
- Move your mouse to look around
- Roll your scroll-wheel to move forward and back
- Get out of navigation mode by right-clicking again
Applying Shaders
Select some brushes either in your 2D view or your 3D view:
Now apply a proper shader to your brushes.
- Find a shader you like in the Shader Browser
- Double click on the shader to apply it to the selected brushes.
Continue to experiment with a few different shaders on your brushes. Note that only basic texturing is displayed in NetRadiant: in-game your shaders may have special effects such as transparency or normal mapping.
Using the rest of the tools
First of all: try using the Q tool in your 3D view. You will discover it works almost identically to in the 2D view.
Now try the two other major tools:
- R for Rotate tool
- Self explanatory
- Click the coloured circles to rotate along restricted axes
- W for the Transform (move) tool
- Allows you to move brushes in restricted directions.
- Clicking and dragging on one of the coloured X, Y or Z axis arrows will allow you to control the direction of movement
- Clicking within the "gizmo" (cyan rectangle) will allow you to move the brush just like the Q tool.
The W tool is especially useful in the 3D view where using the Q tool would move them in ways you may not want. .
Final Basic Editor Functions
2D view
Basic movement:
- Hold right click and drag to 'pan' around
- Roll your scroll wheel to zoom in and out
Changing the view angle:
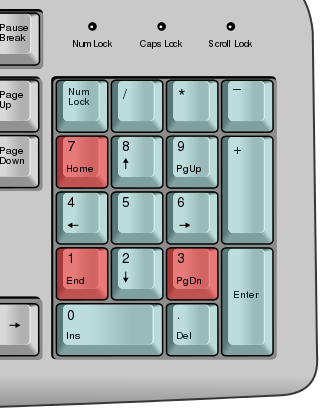
- Numpad Home to look from top/bottom
- Numpad Page Down to look from the sides
- Numpad End to look from the other set of sides
If these keys do not work, try toggling your Num Lock key.
Grid Size
Numbers 1 to 9 on your keyboard will switch to different grid sizes, 1 being the smallest. On small grid sizes not all lines will be displayed until you zoom in.
First Task
Make a small map out of basic rectangular brushes.
Do not make a full map
If you try to make a serious and complete map every time you open NetRadiant: you will tire very quickly. Small and quick test maps, with little care for appearances, allow you to test layouts and learn quickly.
To start, add a familiar entity such as an Overmind by right clicking the 2D view and finding team_alien_overmind under team. This will give you a sense of scale to what you are building.
Tips
- Leave the roof until last. Make some basic walls, floor and obstacles
- Use a combination of the 3D and 2D views. Each is easier and better to use for different tasks
- Use a large grid size
Clipping Plane
You may have troubles with the default clipping plane distance:
The 3D camera in NetRadiant can only see for a certain distance -- everything beyond that point is literally clipped out of existence. The 'clipping plane' represents the mythical flat surface separating what you can and cannot see.
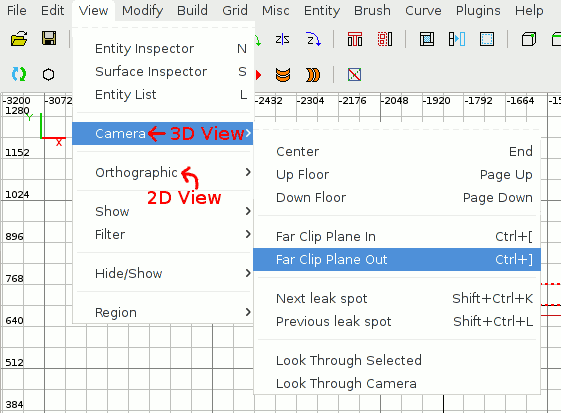
The clipping plane's distance from the camera can be extended by pressing Ctrl+]. Larger clip distances can reduce the frame-rate of the 3D view, because more things will have to be rendered.
Colour Scheme
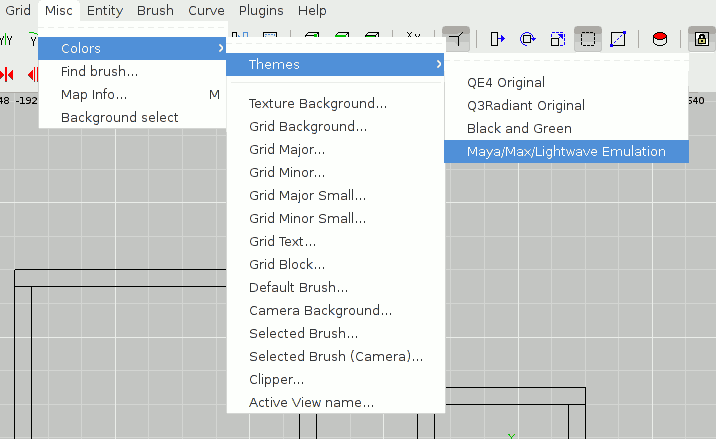
The default colour scheme has poor contrast between the grid and unselected brushes. The Maya/Max/Lightwave Emulation theme is the best for human eyesight.
Scale
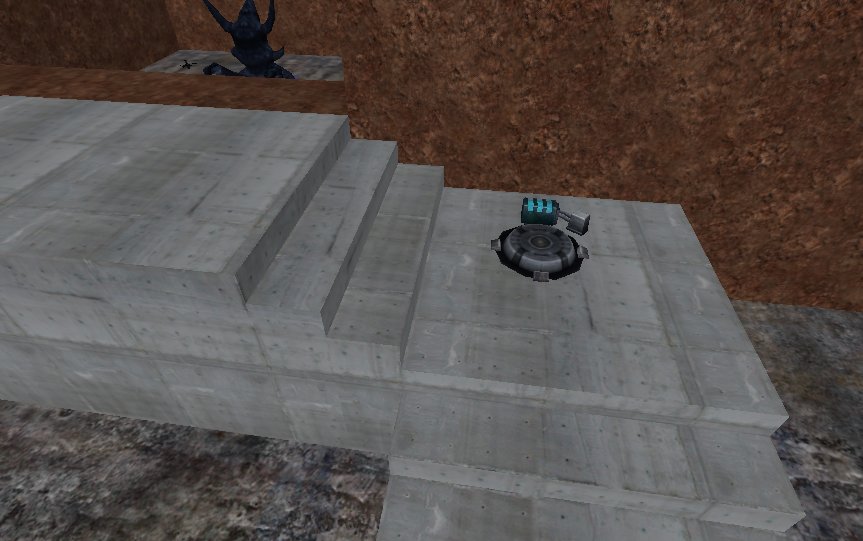
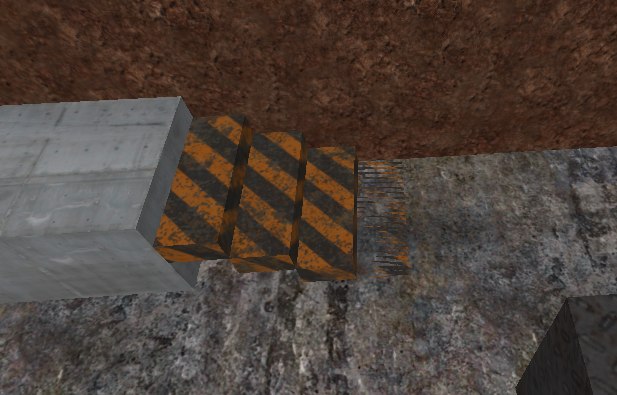
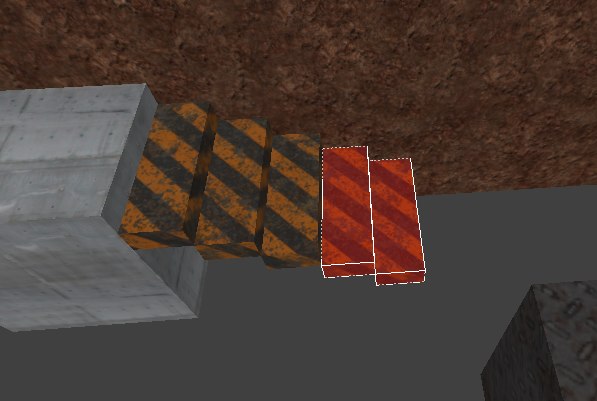
As stated before, it is difficult to obtain a sense of scale in NetRadiant. A good technique is to keep placing entities in areas where your work is going to be scale-sensitive, eg doorways and stairs. Here you can see the stairs are OK, but a little large:
Hiding Brushes
It is difficult to select brushes hidden inside other brushes. You can hide brushes temporarily by pressing H with them selected, and reveal all brushes again by pressing Shift+H. This is especially useful for complex areas or modifying a map after a roof has been made.
Before:
After:
Adding Lighting
Lighting is just as complex a topic as the rest of mapping. Its power is flexible: from mild decoration to completely controlling how a map plays and feels. Mappers develop their own style of lighting and use it in different ways.
Lights are found in the right-click menu on the 2D view. Basic lights with an intensity of 1000 are enough for now: you will need to trial and experiment to see their effects.
Necessary Objects
Intermission camera positions
Daemon will not load your map unless it has an info_player_intermission object in it. When at the join-a-team screen the game uses this object as a position to place the player's camera.
Similarly info_alien_intermission and info_human_intermission are useful. All of these entities can be found in the right-click menu of the 2D view.
Team structures
Both teams require at least one spawn. Traditionally an RC, Overmind and basic defences are also provided.
Make sure you place these objects floating slightly above the ground. Placing them in or on the ground may lead to Daemon deciding to refuse their lease on existence.
Compiling the map to try in-game
Read #Important Unvanquished Map Concepts
The terminology and concepts in the proceeding sections heavily relies on what you have learned earlier in this page
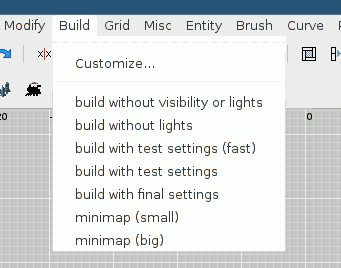
Various preset compilation options are found in the Build menu:
Compilation can be a very slow process due to the amount of calculations the compiler performs. The first few settings are designed to be faster at the cost of skipping or performing more approximate calculations of features such as lighting and VIS. The last few shown in the screenshot are for the current minimap system, which may be replaced with a different system in the future, and is not covered in this tutorial.
You can observe the compilation process in the console area of NetRadiant. The common problem you will encounter is leaks: if you are having other compilation issues, please contact other developers and mappers on IRC or the forums.
Fixing leaks
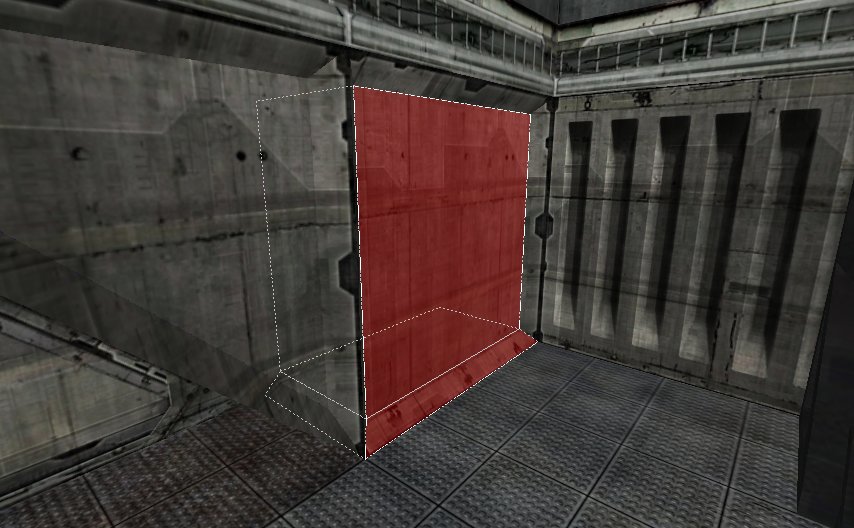
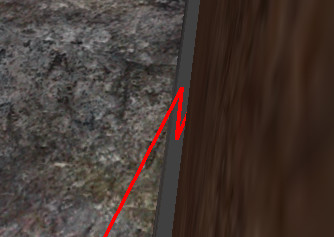
Leaks from the the warm, dark recesses of the game into the infinite void beyond are politely marked with red 'escape routes' by NetRadiant:
If you have multiple leaks in hidden spots, they can be navigated for you:
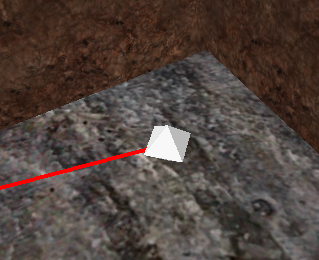
q3map assumes that all objects are on the 'inside' of your map, therefore leak detection is done starting from these objects. You cannot store any type of entity outside of the boundaries of your map without causing leaks:
Once leaks are fixed you can try compilation again.
Playing your Map
Start Unvanquished and open up the console.
You have two options to load your map:
- /map <mapname>
- /devmap <mapname
The former loads a map normally and starts a local server for you to play on. The latter does the same with cheats enabled such as instant-building and noclip, greatly aiding in testing maps.
Useful Commands
Remember to precede all commands with a slash, otherwise the game assumes they are chat messages.
- noclip — puts you into a 'ghost mode' where you can fly through your map
- r_clear 1 — blanks the screen between frames: useful when flying outside of a map
- bind p noclip — binds the 'noclip' command to your P key on your keyboard, for example
- give — gives you credits, confidence, etc
- give health
- give funds
- give bp
- give all — NB does not give momentum
- give momentum
- team — change teams
- team spec
- team alien
- team human
- kill — commit suicide
- r_showtris 1 — outlines all triangles being rendered
Congratulations
You are now mapping in Unvanquished!
Further skills
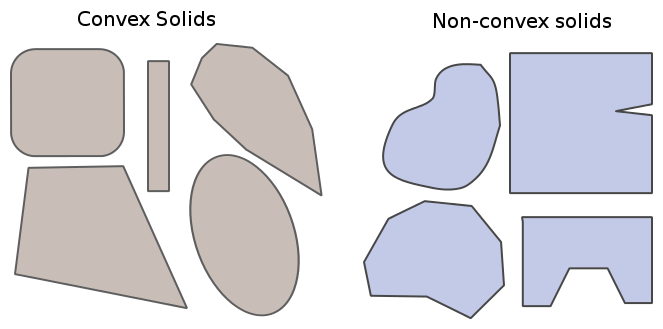
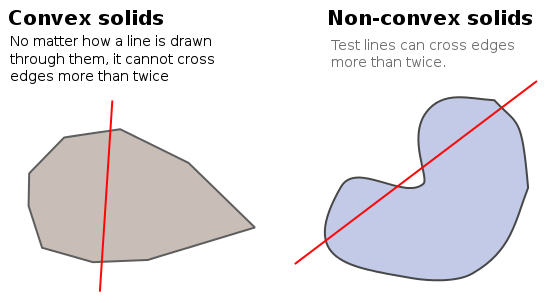
Limitation note: Quake derived engines such as Daemon cannot handle non-convex solids. Convex solids, like cubes and spheres, have no point that goes 'into' them like a cave or an indent. Non-convex solids are the opposite.
Mathematically you test this by drawing lines that go through your object to the other side. If you can draw a line, in any way, that can go through the surface of the object more than twice then that object is not convex.
When you need to create non-convex solids in NetRadiant, simply do it across multiple brushes. You may feel the editor is 'refusing' to allow you to modify shapes in some ways sometimes: this is why.
Working below whole-brush level
NetRadiant allows you to select and manipulate both brushes themselves and the components that make brushes up.
- V for vertices. Verts are the 'corners' of brushes
- E for edges.
- F for faces.
You can manipulate verts, edges and faces with the standard array of tools. Common uses include:
- Modifying verts to create interesting shapes
- Applying shaders to only certain faces of a brush
To change the amount of vertices/faces/edges in an object, you must either use a non-box brush type or equip the clipper tool.
Clipper Tool
NetRadiant has a powerful 'clipper' tool that allows you to slice brushes into new objects. It's hotkey is X and it lives to the right of the Q, R, S and R tools on the toolbar.
To use:
- Select your object
- Click outside of the object somewhere to make your first point
- Click on the other side of the object somewhere to make your second
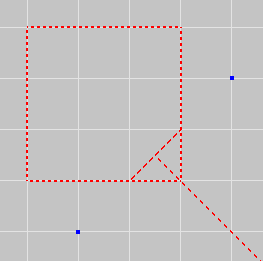
Now a line will be drawn through your brush, and the bit to be cut will be marked:
You can now:
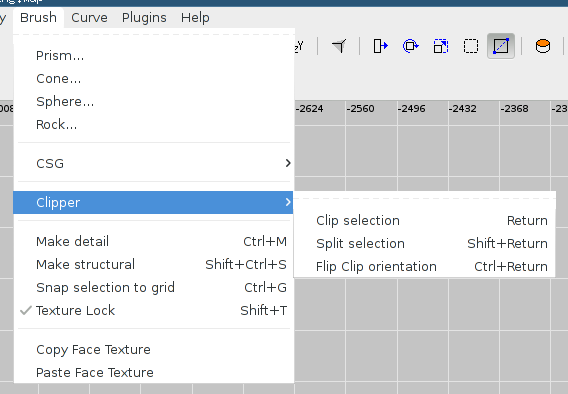
- Clip away and delete the marked piece by pressing Return
- Clip along the line and keep both parts by pressing Shift+Return
- Swap which part is marked as 'garbage' by pressing Ctrl+Return
TODO: Easy way of cancelling clipper points without having to change to another tool and back again.
Brush Shapes
Although the box or 'rectangular prism' is the default brush shape, brushes can be put into many other types of shape too. Have an explore inside the Brush and Curve submenus.
- Editing cylinders in vertex mode allows you to change their path/shape smoothly, instead of moving actual individual vertices.
- Patch meshes are flat surfaces with lots of vertices spread across them, useful for making natural ground.
Caulking and Detailing
Dragons be here
Traditional methods may disagree with some of what's in this section. If you think this section is misleading or erroneous, please express yourself in the Talk page first!
https://en.wikipedia.org/wiki/Wikipedia:Lamest_edit_wars
Although caulking everything has been traditional advice -- and is sometimes still very good advice -- compilers have improved a little and the situation has changed over the years. If what you propose is correct, then other editors can confirm your evidence, etc. etc. and no one will go home feeling hurt. For the time being however: it's easier for new mappers to avoid caulk in their first few attempts, and there is no performance penalty for players.
'Caulk' is a special shader you can apply to either whole brushes or just select surfaces in order to tell the game not to render anything there. Caulk is effectively a way of making windows in the void beyond your map.
Many quake mapping tutorials and mappers caulk everything they player will never see. This does no harm whatsoever, but the q3map compiler used for Unvanquished is very mature now and does this work itself.
There are however other advantages and uses for it in certain situations:
NetRadiant Filtering
You can use caulk to allow working on your map in NetRadiant to be easier.
Once a map is walled and roofed in it can be annoying to be constantly either hiding brushes or moving 'inside' the confines of your map's corridors to work on things inside the map. If you caulk the faces of walls, ceilings, floors etc that face outwards you can then tell NetRadiant to 'filter' these surfaces out.
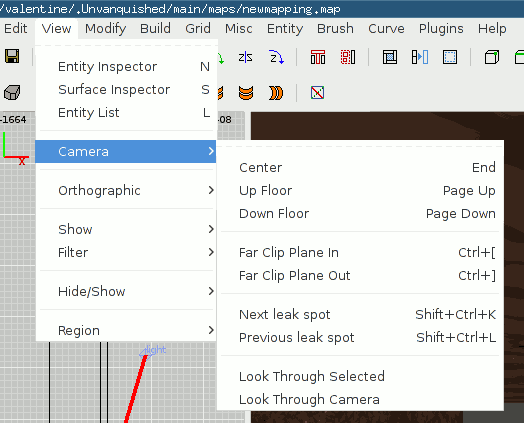
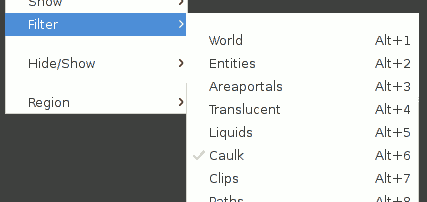
To make caulked surfaces invisible (filter them out), look in the View->Filter menu:
Now you can work 'through' walls:
This type of caulking will not affect player performance, as externally facing surfaces are filtered out by the compiler anyway.
Speeding up map compilation
The more brushes and surfaces a map has, the more time the compiler takes to perform its calculations. As the compiler has to take into account the interactions of brushes across space (for eg visibility), adding more brushes and detail to an area exponentially increases compilation time.
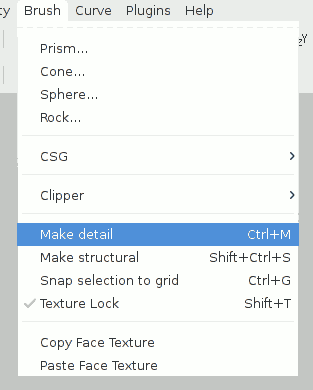
One way of speeding up this process is to tell the compiler to pretend certain brushes are see-through. These are called 'detail' brushes. Press Ctrl+M on a selected brush to make it a detail brush (or Ctrl+Shift+S to make it 'structural' again).
Commonly small brushes that obscure little of the map are flagged as 'detail', however larger brushes can also be successfully marked as so.
Unfortunately the compiler does not optimise meshes obscured by detail brushes. These surfaces must be manually caulked. Depending on how detail meshes and caulk are used in this manner, player performance may increase or decrease a very small amount, however the main concern with this method is optimising compilation time.
Further reading
Please see the main Mapping page.

